My Hungry Bin worm farm is trucking along just nicely after many years.
I adore my Hungry Bin worm farm, but for various reasons it’d been ‘house-sat’ elsewhere for the past 12 months and came to a sticky end – not the bin itself, which is sturdy, but the wriggly friends within it. Worms don’t like heat and unfortunately it was a heck of a January and turned into somewhat like an oven. Oooops.
The bin has now been rehomed, just metres from my kitchen and I’ve gone through the ‘housing’ process of bedding in my new worms.
It was really easy to empty, hose and scrub down my Hungry Bin ready for transport. The clips that hook on the ‘under-carriage’ are still sturdy and there are no cracks to the body. Perfect.
But first, did you know Worm Wee isn’t wee at all?
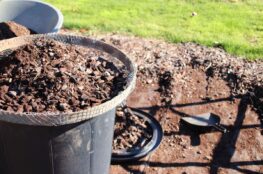
 Spoiler alert! In reality worms release their water-waste through the external pores of their body. They excrete castings (aka vermicast) which appears as dirt-like soil. So, that brown looking glorious ‘worm wee’ that is so great for the garden is in fact just watered down castings. Watered down with what, you may ask? A combination of moisture from the food scraps you’ve thrown in, a little rain, etc.
Starting from scratch: Worm Farming
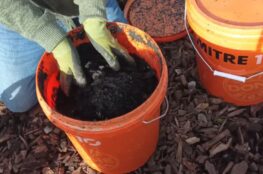
For the ‘bedding’ in which the tiger worms first settle, this time I trialed a worm bedding block that I found in my local Bunnings store. It is made from compacted coconut fibre and literally just needs a soak in water to expand and breakdown into a gloriously rich base upon which the worms will nuzzle down and settle.
It seems to be doing the job nicely, although it only saved a few minutes putting my Red Bands on and digging into the compost bin 50 metres away!
The jury is still out — nice to have but not essential as good turned compost would do the trick too.
 The worms were harder to find this time around. No longer do DIY stores appear to sell them. Alledgedly (according to a couple of staff members I spoke to) the worms overheated over summer on the shelves and had to be removed.
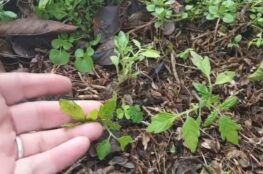
I did find a magical source locally though, called Wriggle Farm. The worms (of various maturity, including eggs) are weighed and delivered all around New Zealand from their Ohaupo base, in a cotton bag and cardboard box — not a single piece of plastic in sight. Nice.
Bed the worms into your base and allow them to settle for a few days, then start adding your food scraps – just a centimetre or so thick on top to start, then you can get a bit more generous once the worms are ‘underway’ and begin to bred.

So all is well in the world of worms in my neck of the woods.
Worm Fodder
Just a reminder of what worms like and dislike:
LIKE
- dust fibre from the dryer
- most food scraps (raw or cooked), the smaller chunks the better
- wet shredded/torn cardboard and paper (including handy towels and toilet rolls)
- crushed egg shells
- tea bags and coffee grinds
DISLIKE
- spicy vegetables (capsicum, chilli, onion)
- citrus
- meat, fish
- dairy
The ‘dislike’ list can be thrown in your regular compost pile however if you wish (although I avoid meat and fish as it’s smelly and attracts nasties).

May 20, 2020
Wow :)
This is an incredible collection of ideas!
May 22, 2020
Cheers Ash! I hope you find some gems amongst my hundreds of blogs! >>Julie