Trending in recent years, Kombucha (fermented tea) can be store-bought or made at home. On the road to self sufficiency, I try my hand at making a batch of my own.
Probiotics, cultures and fermentation go hand in hand. It’s good for our gut health and a whole bunch of people swear by it.
How do you make Kombucha?
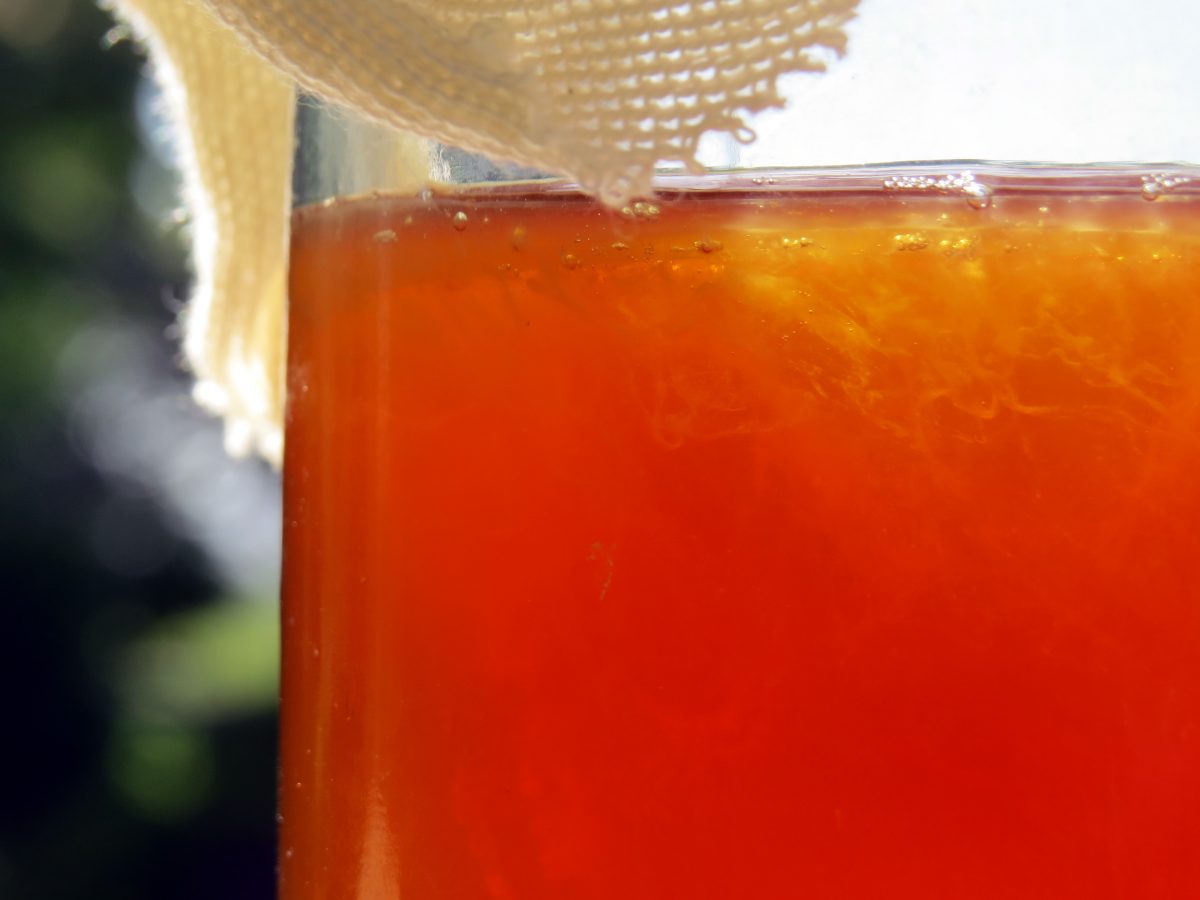
While it starts off like a seemingly innocent sweet, cuppa oolong, things get a little funky when you add a SCOBY (Symbiotic Culture Of Bacteria and Yeast) a term you will hear a lot about in this post. The culture reacts with the sugar and fermentation takes hold during the 5-7 day ‘brewing’ process.
The basic recipe: 2 black tea bags, 1/4 cup of white sugar, 3 cups of boiling water, 1 SCOBY (see below) and 1/2 cup of ‘starter tea’ or kombucha from a previous batch. Steep the tea, dissolve the sugar, cool completely, add SCOBY and the tea it was sitting in and store in a jar with a breathable lid, for 5-7 days.
It is ALMOST that simple. Let me explain a few things!
Types of SCOBY
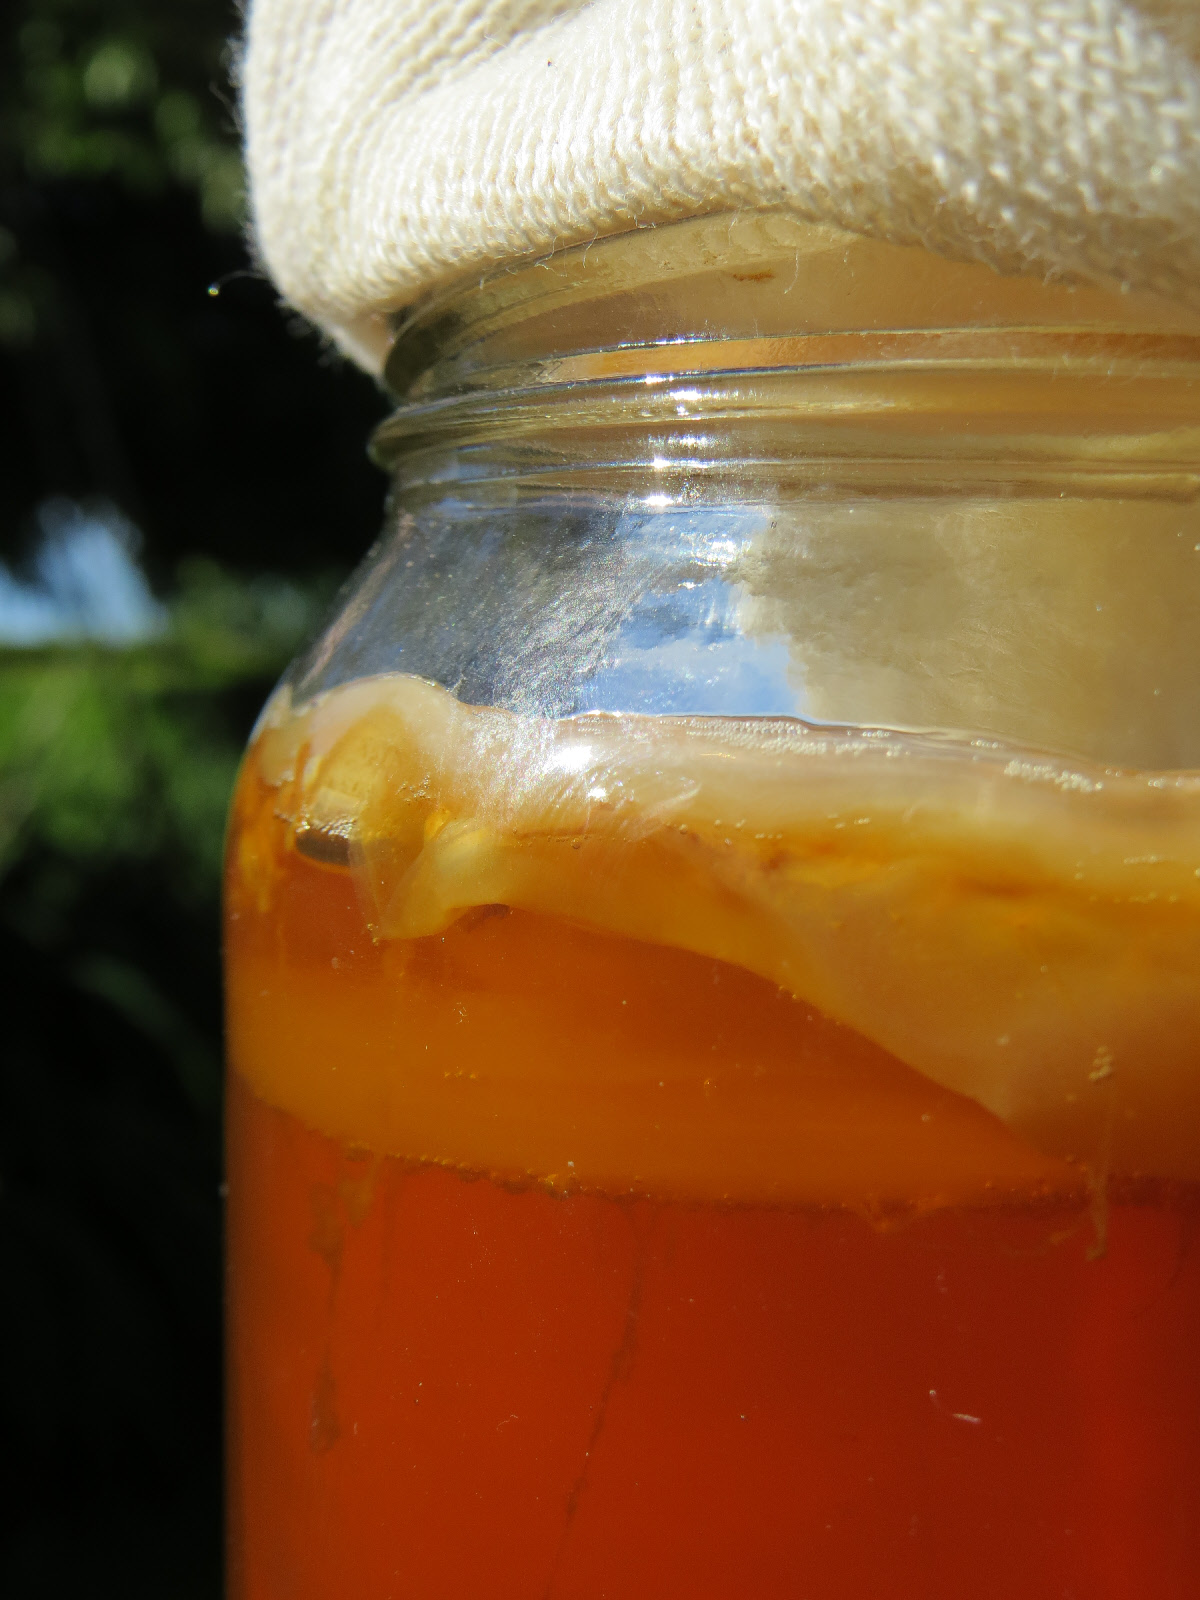
A SCOBY is required to activate the fermentation process and looks like a thick disc of opaque, firm jelly. You only need one as you can generate more yourself over time. Beg, borrow or buy your first SCOBY (yes it can be sent to you via courier in an air-tight bag). It will come swimming in approx 1/2 cup of kombucha from a previous batch. Both will be required to start your first brew.
Often referred to as the ‘mother SCOBY’ it may rest at the bottom of the jar, float or rest diagonally in the brew jar. Any way is ok. If it floats you may find a ‘baby SCOBY’ attaching itself to it while the jar of tea ferments, or if mother is resting on the bottom the baby may form on the surface quite independently.
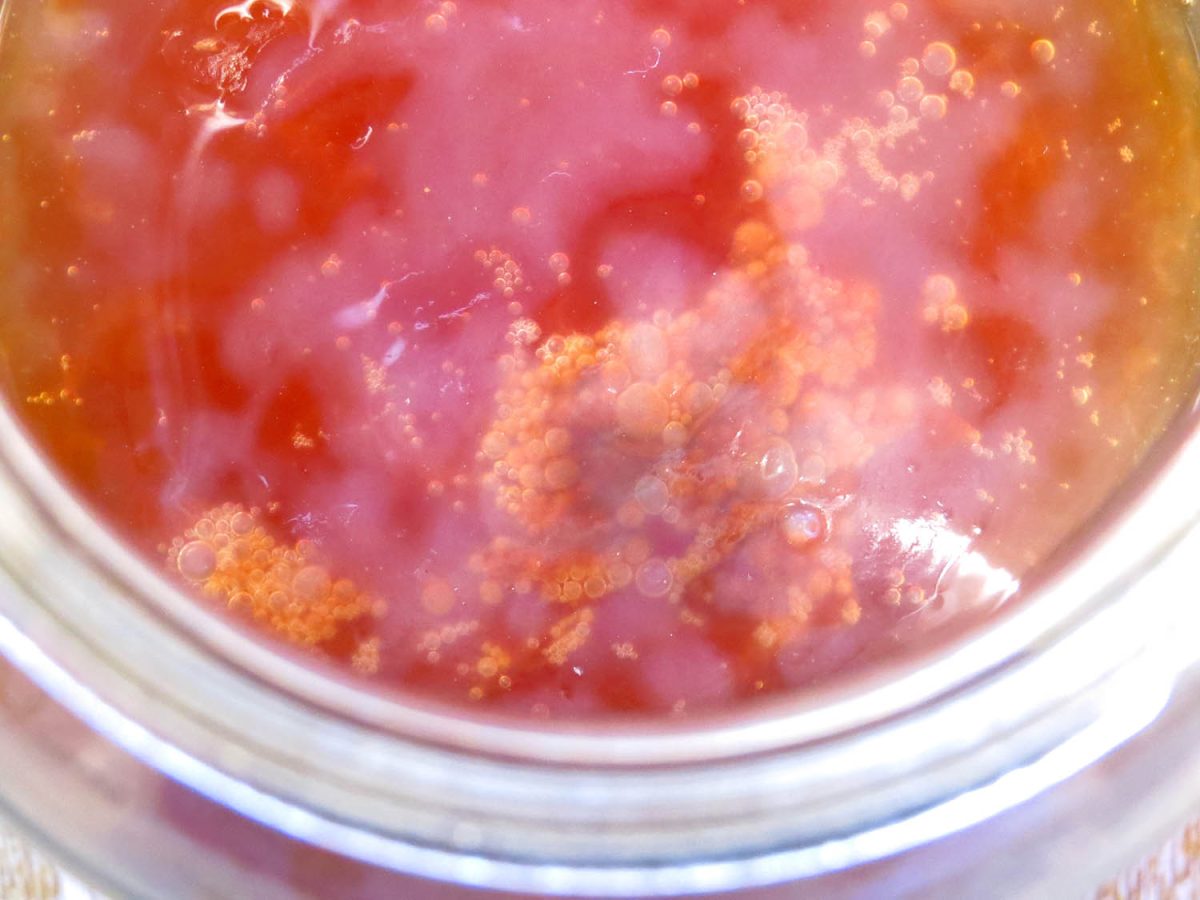
To be honest it’s all a bit weird but we need to grow to learn ‘weird is ok’. The baby that will grow on the top of your fermenting tea may resemble: a jelly fish with long tentacles of yeast that dangle down; the milky way – a mass of milky splodges that join together to form a thin opaque film to sit on top of your tea during fermentation; or alien dark patches that lurk in glumps.
It doesn’t sound very appetizing I know — but face your fear and do it anyway.
The result (being the taste of the fermented tea) is surprisingly nice! Don’t worry. Your SCOBY is only a culture (in a similar fashion that the Ginger Beer has a ‘bug’ that starts its flavoursome journey. You don’t need to eat the SCOBY it’s just there to do its thing.
Beware of Mold
While there may be strange things happening in your kombucha as it ferments, don’t necessarily mistake it for mold unless it is suspiciously green or black and furry (as you may experience at the top of a batch of jam that hasn’t sealed right). Dump the lot – both the SCOBY and the tea you are fermenting. Apparently it is unrecoverable (so the story goes — I haven’t come across any yet to provide personal experience in the mix). Brown globs are ok.
Storing your fermenting Kombucha
Definitely use a sterilised jar (one litre Agee jar works well) and follow instructions of tea making. Cover the opening of the jar with a breathable cloth secured with a rubber band — keeping dirt, dust and flies off, while allowing the fermentation to ‘breathe’. Keep out of direct sunlight but in a warm place. It doesn’t have to be a dimly lit pantry, nor the hot water cupboard. I kept mine in an airy and light filled garage on a shelf. Note: photo below was to show you the SCOBY growth, it’s not stored on my outside table (just saying).
 How do you know your Kombucha is ready?
It will depend a lot on temperature and the environment (it will likely take a quicker time in summer months than winter months). Most recipes recommend taste testing between 5-7 days (but apparently up to 30 days to complete the brewing process in extreme instances).
There should be small bubbles under the baby SCOBY. When you check and taste use a straw or plastic spoon and try not to disturb the baby SCOBY growing on the surface too much. When you think it tastes great (sweet yet turning a little sour with an effervescent feeling on your tongue) carefully remove SCOBY mother and baby 1/2 cup of kombucha. Put aside to make a new batch straight away, or store in an airtight container in the fridge. Drain the remaining kombucha into an air tight bottle and keep in the fridge ready to drink your ‘glass a day’ for good gut health.
What should it taste like?
I must say, after decantering my first ever batch of kombucha I was quietly impressed. Just as I had read, it delivered a slight fizzy feeling on the tongue, a sweet drinkable beverage with a slight sour aftertaste. Having my first sip I raced out and bought a bottle at the supermarket to compare flavours. Disappointingly supermarket product was very vinegary in comparison, I didn’t take to it at all. I am glad I didn’t try the store bought version first as it may have put me off indefinitely!
Reusing old SCOBYs
This is encouraged! In fact, for your second batch use both the mother and baby together. For each consecutive batch you can keep piling them up (3-4 high) but after a while you may want to remove any thicker/older SCOBY to (a) give to friends or (b) start more brews. This way you can have several jars fermenting at any one time. Be sure to wash your hands before handling SCOBY or use sterilised rubber tongs to remove.
Storing the finished brew
Even while the SCOBY has long been removed the kombucha will continue to ferment. Keep in the fridge and drink within a few days. Left on the bench it will ferment faster and turn to vinegar quickly.
There you go, a first time for everything.
I will add to the post over time as future batches bring new results. Bottom’s up.


September 29, 2024
I keep a bottle of kombucha next to my stove and frequently use it to deglaze the tasty juices from the pan, and to add flavour and acidity. I used to buy cheap wine for this – not now.
October 9, 2024
Hi Karen, what a fabulous idea! Thanks for sharing! >>Julie