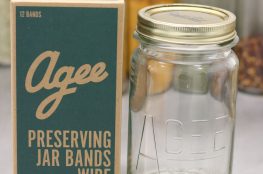
Good hygiene and trusted preserving methods are essential for long-life, shelf-stable preserves that will last for months in your pantry. Sterilising jars and bottles are essential before preserving.
Several generations ago our great-grandmothers (great-great even, you get the picture) would most probably have used ‘a copper’ (a large sturdy copper pot) to sterilise most things – from laundry to preserving jars and no doubt a few batches of blackberry wine.
Then along came electricity!
Here’s an extract from the Whitcombe’s Modern Home Cookery & Electrical Guide (1940):
ELECTRIC OVEN BOTTLING: Various methods are used in the preserving and bottling of fruit and vegetables, most of which require a good deal of preparation and labour. In fact to such an extent has this been true that many housewives have completely given up preserving because the amount of work it entailed.
The introduction of electric oven bottling has completely changed all this, and the lucky housewife whose kitchen is graced by an electric cooking range may bottle the various kinds of fruits and vegetables which lend themselves to the preserving process, with a minimum of trouble and certainty of results which makes the whole business a pleasure rather than a labour.
Careful attention to the following instructions, however, is necessary: all jars, bottles, tops and rubbers must be sterilized by placing them in a pan of water and putting them on top of your range and bringing them to the boil.
Fast forward to the 2000’s, while efficiencies have improved, the ‘boil in the pot’ trick certainly continues to be one of the more popular ways to sterilise preserving jars before use.

BOILING
In a large pot of cold water, submerge small clean bottles and jars. Bring to the boil for approx 10 minutes, turn off the heat, then leave them soaking until you need them. The lids can be added too.
Be careful removing from pan as they are piping hot, of course! Have tongs handy. After removing the jars from the water I generally drain them upside down on a paper towel to allow any water to drip away or evaporate.
OVEN
Dry sterilising is a great way for larger bottles that are awkwardly difficult to fit into a boiling water pan! Firstly wash the bottles in hot soapy water. Make sure they are free from any residue on the inside from previous usage and use a bottle brush (you can pick these up from the supermarket) to ensure it’s squeaky clean inside. Rinse then put into a cold oven and turn up to 140°C (putting them inside a hot oven may see them crack). 20-25 mins should do the trick. Be careful when removing as it’s obviously hot glass! NOTE: would recommend you boil the lids in a small saucepan of water.
DISHWASHER
If you have the luxury of time (or an efficient dishwasher cycle), this is great if you have a large amount of bottles and jars to sterilise at once, as I generally do when putting on a batch of chutney (can be up to 4 litres at a time). Cycle finished, jars are hot, sterilised and dry – perfect.
VINEGAR
All glass jars should be hygienically clean of course, so this isn’t a cheats way. However, a super-speedy way to sterialise in a hurry is to add a splash of cider vinegar in each bottle with the lid on, shake it about and discard contents.
 STERILISE EVERYTHING!
- glass jars and lids
- plastic funnel
- knife (this is good for poking around in the jar once full, particularly for jams/chutneys, to help any air bubbles escape)
- spoons & ladels
TIPS:
- keep a sink of warm soapy water ready for spills and general mess
- keep a saucepan of boiling water on the go in case you need to resterilise anything or reheat lids
- have a quantity of sterilised cloths handy (or disposable paper towels) to wipe any drips from the neck of the jars/bottles to allow a tight seal once the lid/cap is on (don’t use the kitchen cloth)!
- fill the jars while they are hot
- once you have filled the jars and tightened the lids, turn the jar upside down for 5 minutes. I find the hot contents against the lid helps the seal and discourages lid popping.
- while your preserves may last 12-24 months unopened on your shelf, be sure to refrigerate once opened.
Remember, both lids and bottles can used time and time again. Be sure that both are in top condition (seal still air tight, nothing rusty, cracked or difficult to clean). Once the filled jars have cooled down, you should be able to press down the centre of the lid so it is indented, to ensure the ‘pop’ of airtight quality when you open it!
 Happy preserving!


