Where Tools Retire with Dignity: Build a Garden Gate
There’s something quietly noble about an old garden tool…the worn handle, the chipped enamel, the marks of a hundred seasons etched into its surface. These are the tools that helped carve out paths, plant seedlings, and turn compost. Rather than relegating them to a dusty shed corner or tossing them out, why not give them a place of honour? Upcycling them into a decorative garden gate is a beautiful way to preserve their legacy and add a one-of-a-kind feature to your garden.
Tools That Tell a Story
When choosing tools for your upcycled gate, focus on those that have a history—or even a bit of character. Think cracked handles, well-worn grips, and slightly rusted blades. These signs of age don’t make them less valuable; in fact, they bring soul and authenticity to the final piece.
Great tools to include:
- Spades and shovels
- Garden forks
- Trowels and hand forks (smaller tools work beautifully to fill gaps or decorate the top corners of the gate)
- Hoes
- Rakes (broken or intact)
- Shears and Loppers (they’re more delicate, but they can be striking when used as decorative crossbars or accents)
- Pick-axes
Most vintage garden tools are made from steel which offers excellent strength and resistance to corrosion (hence why they’ve lasted so long). However this makes drilling or screwing into the steel directly difficult. That’s why choosing tools with wooden handles is best. These will be your primary attachment points to connect each piece to the wooden gate frame.
Embrace the Rust or Refresh It?
A bit of surface rust can enhance the gate’s rustic charm. But if you’re after a cleaner or more weather-resistant finish, you can treat the metal components before installation:
- Scrub off loose rust with a wire brush or sandpaper
- Apply a metal primer suitable for outdoor use
- Finish with a waterborne exterior paint
For those wanting a more natural look, linseed oil can be applied to the wooden handles to revive their appearance without altering their patina.
 How to Build a Decorative Tool Gate
This project requires
- 6m lengths of 90x45mm radiata SG8 H3.2 framing timber
- 290x45mm radiata SG8 H3.2 framing timber, optional
- assortment of 10g x 75mm, 14g x 100mm and larger screws as required
- M8 threaded rod and 2 x nuts
- old garden implements
How to
Step 1: Arrange gate design on a flat surface. Place lengths of 90x45mm framing timber to form a rectangular frame. Width and height should be adjusted to suit gate requirements.
We’ve used a pick axe to act as the central supporting upright that touches both the upper and lower sides of the frame. Arrange all other tools so the wooden handles are connecting with another wooden surface. This project includes a decorative curved upper gate rail, which is optional.

Step 2: If opting to use decorative curves, create a pendulum out of a pencil and string to mark shallow curves in the 290x45mm framing timber. Cut to shape and sand edges.


Step 3: Cut 90x45mm framing timber to size for the left and right sides and lower parts of the frame. Clamp together. Drill pilot holes then secure with 100mm screws, including decorative framing inserts if using.

Step 4: Cut down handle of the central supporting tool to be used as an upright to snuggly fit between the upper and lower gate frame. Size up what sized screws will be required (this will depend on the thickness of the final frames chosen). Drill a pilot hole through both the frame and axe handle (as we did for this project), then secure with a long screw at both top and bottom.


Step 5: Stain structure. For this project we have used two coats of Resene Woodsman waterbourne penetrating oil stain exterior tinted to Cedar.

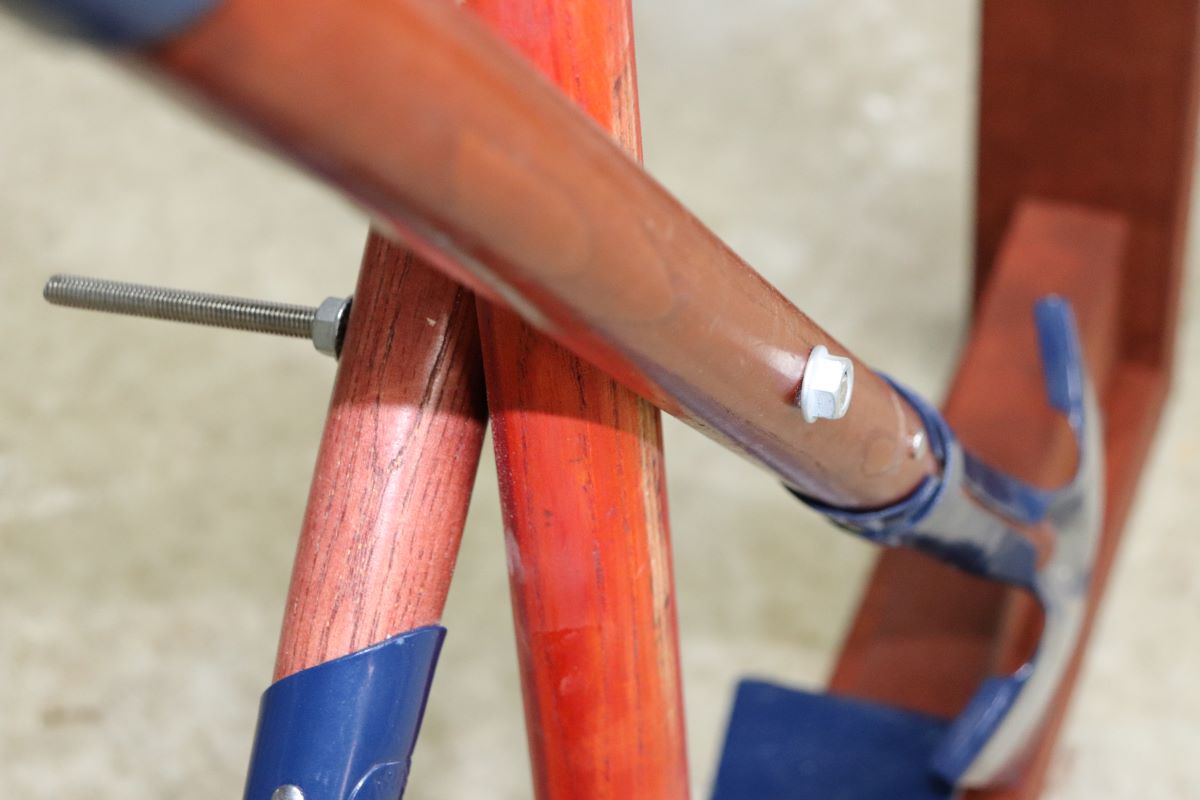
Step 6: Arrange two tools of equal-length on either side of the central supporting upright, crossing to form a spoke pattern. Ensure that wood touches wood to secure as it will not be possible to drill/screw through the carbon steel. Drill a pilot hole through all layers as they cross in the centre, then secure with a bolt.
Step 7: Continue to arrange more tools in place to form a balanced pattern. Mark and cut down wooden handles as required for a snug fit between the central supporting upright and sides. Screw through central supporting upright and, where possible, to all other touching wooden surfaces for stability.
Hinge then the gate is ready to hang on the post.

As seen in NZ Lifestyle Block Magazine, written by me!


