So many panes of glass, so many wooden frames. If you sigh at the thought of painting Villa windows (whether new, reclaimed or existing), you are not alone.
The thought is daunting. I’ve recently repainted in our kitchen renovations so have some relatively fresh advice.
Preparation is the main point so don’t skip it.

 Sanding
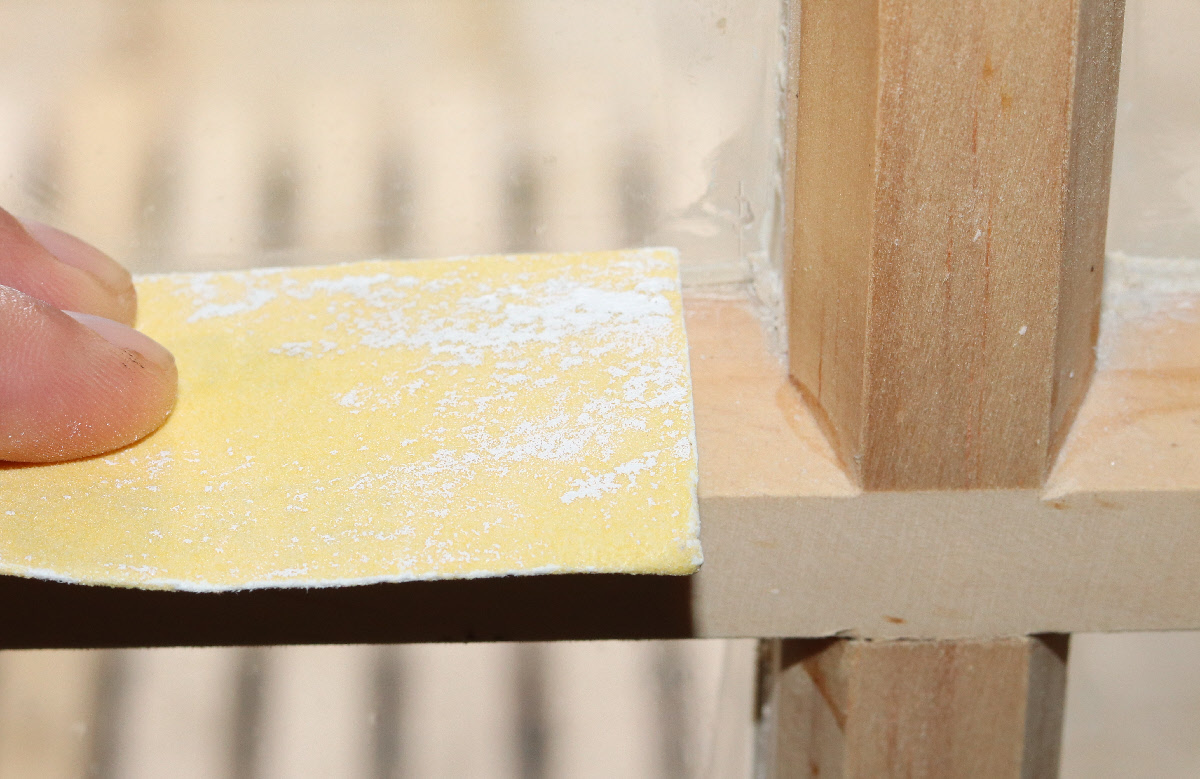
New Windows: Even if you have brand new windows that are down to bare wood, use a 180-240 grit sandpaper and by hand, slightly skim the surface of the window frames. There may be burrs of fine splintered wood, or fine specs of dried putty that need removing.
Existing or Reclaimed Windows: If you are facing multiple layers of paint that has already started to crack and bubble, it would be in your interest to remove as much ‘dodgy’ paint as possible. This doesn’t mean going back to bare wood but will need a good tidy up. We’ve tackled some heavy-duty window DIY before so if you are in this boat check out our Stripping 90 years worth of paint blog! Paint stripper and drop cloths to protect the surface beneath will be required! However if the window frames look in good-painted form but you’d like to change the colour for example, you’ll need to Sugar Soap the surface to remove fly spots and general grime, allow to dry, then scuff the surface of the wood (enough for the new paint to grab) with a 120 grit sandpaper.
Dusting
In any case, when it comes to sandpaper, you’ll need to remove the sawdust, regardless of how fine you think it may be. With a hoover or a craft paint brush, remove all the sawdust to ensure all the surfaces are free of dust and debri.

 Masking
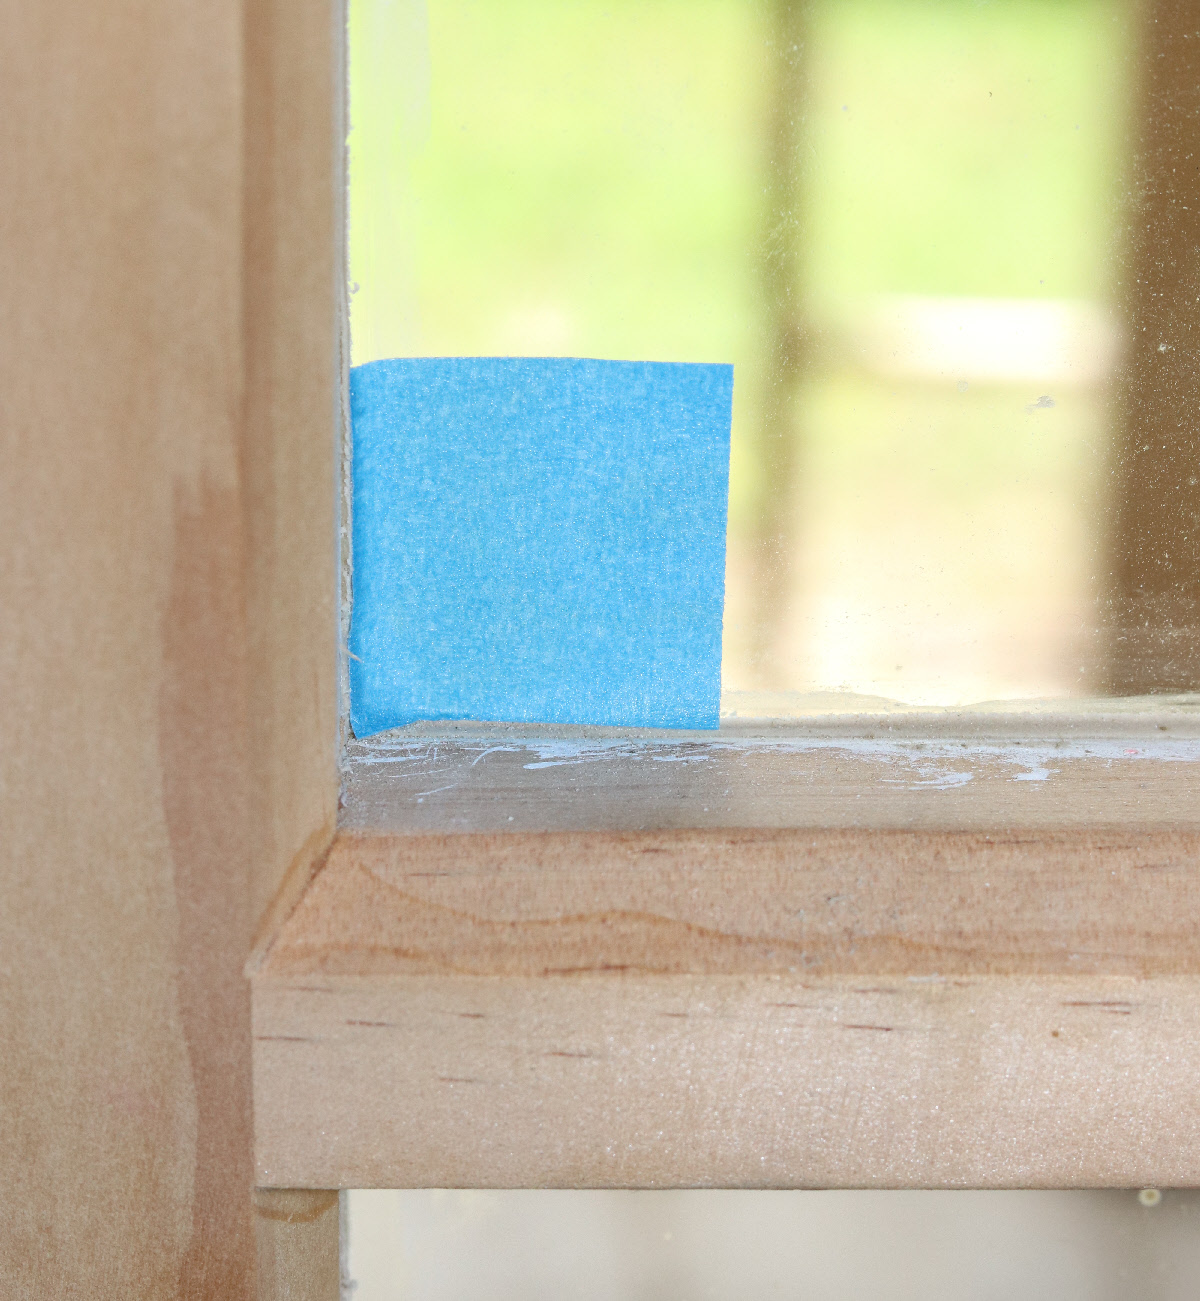
It’s a painful job if you have multiple wooden panels but SO worth it. Pour a glass of wine and get into it. I found the blue painters tape is best. Anything else may stick to the surface and you’ll have a heck of a job (a) removing it and (b) removing the sticky residue it may leave behind. Now masking is really only needed when painting internal windows. When painting external frames, use the putty line as a guide and a steady hand.
Rather than attempting to cut strips to a perfect length, concentrate on squares for each corner of the window pane, then use shorter pieces of tape to fill in the points between. Ensure the tape fits tightly against the frame but not overlapping the wood. Run your finger firmly over the tape to make sure it fixes. IF paint does seep underneath it, you can always fix that up later once all the coats of paint have been applied.
If your windows have multiple sneaky hard-to-paint-around catches, remove them. Be sensible though as you’ll need to lock up each night so prepare your window frames in realistic batches – literally what you can prime and top coat in one painting day. Hinges can be masked up (so no, you don’t need to remove the window)!
Primer Undercoat
This is only needed if you are painting on bare wood. It seeps into the grain of the wood, forming a better adhesive surface for the top layer to adhere to. For internal windows, follow that format. For external windows, with the wonderful paint technology available, some paints have a primer incorporated so just follow the instructions from your paint supplier.
TIP: ‘loading your brush’ refers to how much paint you have on it. Don’t go nuts. Particularly with Villa window frames (narrow wood surfaces and dainty angles) you only need to dip the top 1-2cm into the paint. Give it a light ‘wipe’ on the side of the paint tin to remove any excess paint that will only lead to tears and paint splodges, then begin your painting.
I would suggest, paint with love and treat every paint layer like it is the final coat. It won’t necessarily be of course, but errors compound. Brush away any drips as you go while the paint is wet, let the paint ‘settle’ and then go back to see if any other drips have appeared.
Top Coat
Semi Gloss is the way to go. Matt paint will forever feel a little rough to touch and a nightmare to wipe off fly spots! Don’t be upset if the first coat of Semi Gloss isn’t the look you are after. The second coat will have you smiling, and the third (if you feel you need it) will have you grinning.
Once you have painted your window, while the paint is still wet, ensure you do a ‘drip check’ to look for paint runs and to brush them out while you can. Otherwise if you discover a dry paint run, use your 180-240 grit sandpaper to lightly smooth it off before painting the next coat. As I mentioned earlier, better to deal with each layer at a time as otherwise the ‘problem’ will compound.
 Finishing Touches
Pour yourself another glass of wine and remove the blue tape. All going well everything will be perfect! Best results are if you don’t leave it for weeks, within a few days is best. If there has been any seepage or the odd paint splatter, remove it gently with a paint scraper. Be gentle, you don’t want to create another problem (scratched window panes)!
TIP: pull the tape towards the frame to remove for a perfect paint line, rather than away from it (which will potentially tear the paint, requiring touch-ups).


