
Good hygiene and trusted preserving methods are essential for long-life, shelf-stable preserves that will last for months in your pantry. But do you really need to sterilise every jar and bottle before preserving?
Well, not necessarily!
What?! I know. That’s what I first thought.
It all depends on what you’re preserving and, more importantly, how you’re preserving it.
Several generations ago our great-grandmothers (great-great even, you get the picture) would most probably have used ‘a copper’ (a large sturdy copper pot) to sterilise most things – from laundry to preserving jars and no doubt a few batches of blackberry wine. Then along came electricity!
Here’s an extract from Whitcombe’s Modern Home Cookery & Electrical Guide (1940):
ELECTRIC OVEN BOTTLING: Various methods are used in the preserving and bottling of fruit and vegetables, most of which require a good deal of preparation and labour. In fact to such an extent has this been true that many housewives have completely given up preserving because the amount of work it entailed.
The introduction of electric oven bottling has completely changed all this, and the lucky housewife whose kitchen is graced by an electric cooking range may bottle the various kinds of fruits and vegetables which lend themselves to the preserving process, with a minimum of trouble and certainty of results which makes the whole business a pleasure rather than a labour.
Careful attention to the following instructions, however, is necessary: all jars, bottles, tops and rubbers must be sterilized by placing them in a pan of water and putting them on top of your range and bringing them to the boil.
Fast forward to the 2000s, and while efficiencies have improved, the good old ‘boil in the pot’ trick continues to be a popular way to sterilise preserving jars.
However, we’ve learnt a thing or two about food safety along the way.
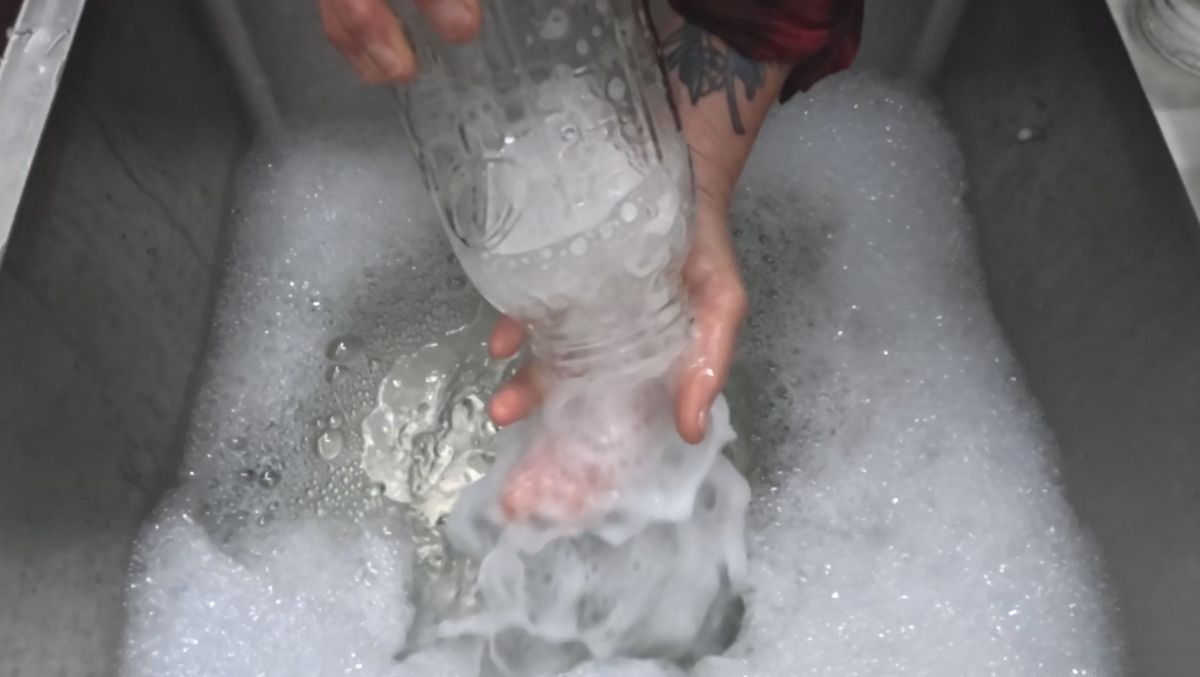
Cleaning, Sanitising and Sterilising – What’s the Difference?
These three terms are often used interchangeably, but they’re not quite the same thing.
- Cleaning removes food residue, grease and dirt, usually with hot soapy water and a good rinse.
- Sanitising reduces microorganisms to safer levels, but doesn’t necessarily eliminate everything.
- Sterilising goes a step further, destroying microorganisms, including those that may survive ordinary cleaning and sanitising.
And here’s where modern preserving methods come into play.
When Do You Need to Sterilise Jars?
Pressure canning: There’s no need to pre-sterilise your jars. They must be thoroughly cleaned and inspected, but the pressure canning process itself achieves the necessary sterilisation when you follow a tested recipe, correct pressure and processing time. Simple!
Water bath preserving: If your tested recipe requires 10 minutes or more of processing in boiling water, you don’t need to pre-sterilise the jars either. The processing takes care of that.
However, if your tested recipe calls for LESS than 10 minutes of water bath processing, your jars must be pre-sterilised first.
Hot-fill preserves: For jams, chutneys and pickles that are simply poured hot into jars and sealed without further processing, pre-sterilised jars are important for hygiene. However, sterilising the jars alone doesn’t make the contents shelf-stable. Modern recommendations favour processing suitable tested recipes in a boiling water bath rather than relying on hot filling alone.
So, while sterilising jars is still useful in certain circumstances, it’s certainly not necessary for every preserving session.
Methods for Preparing Your Jars
BOILING
This remains a reliable method of pre-sterilising empty jars when required.
- Firstly, wash jars thoroughly in hot soapy water and rinse well. Place them upright on a rack in a large pot, cover with water by at least 2.5 cm, and bring to a rolling boil.
- Boil for 10 minutes at altitudes up to 305 metres above sea level, adding an extra minute for each additional 305 metres of elevation.
- Keep the jars in the hot water until you’re ready to fill them.
- Be careful removing them, of course. They’re piping hot! Have a jar lifter or suitable tongs handy.
And remember, modern preserving lids generally don’t need boiling beforehand. Follow the lid manufacturer’s instructions.
OVEN
Dry sterilising jars in the oven has been a popular method for generations, particularly for larger bottles that are awkward to fit into a saucepan.
Traditionally, clean jars were placed into a cold oven and heated to around 140°C for 20–25 minutes.
However, official food safety authorities, including the USDA and National Center for Home Food Preservation, don’t recommend oven sterilisation for home canning. Oven heat doesn’t penetrate jars in the same way as boiling water, and there’s also the risk of thermal shock and broken glass.
So, while it’s a method you’ll still see in older cookbooks and home kitchens, it’s not one I’d recommend for sterilising jars intended for shelf-stable preserves.
DISHWASHER
A dishwasher is a fabulous time-saver! A hot dishwasher cycle can get jars beautifully clean and warm, ready for filling. Some dishwashers even have a dedicated sanitising cycle.
However, a sanitising cycle isn’t the same as the sterilisation required for jars used in water bath recipes with processing times under 10 minutes.
For pressure canning and water bath recipes processed for at least 10 minutes, thoroughly washed jars are sufficient.
VINEGAR
You may have heard the old trick of adding a splash of vinegar to a clean jar, shaking it around and tipping it out.
While vinegar has some antimicrobial properties, a quick vinegar rinse isn’t a reliable sterilisation method and shouldn’t be used as a substitute for proper cleaning or heat processing.
Vinegar does have its place in the preserving kitchen, though! A little white vinegar on a clean paper towel can be useful for wiping jar rims, particularly when preserving foods that may leave a greasy residue.
Don’t Forget Your Equipment!
It’s not just the jars that need attention. Everything coming into contact with your preserves should be thoroughly cleaned.
That includes:
- Glass jars and appropriate lids
- Funnels
- Knives and de-bubbling tools
- Spoons and ladles
- Chopping boards and preparation surfaces
You don’t need to sterilise every utensil when following a tested pressure canning or water bath recipe, but good kitchen hygiene is essential.
A Few Handy Tips
- Keep a sink of warm soapy water ready for spills and general mess. Preserving can be a surprisingly sticky business!
- Inspect jars for chips, cracks and damage, particularly around the rims.
- Keep jars warm when filling them with hot food to reduce the risk of thermal shock.
- Use clean paper towels to wipe jar rims before applying lids.
- Follow the manufacturer’s instructions for preparing lids and seals.
- Use a proper jar lifter when handling hot jars. Your fingers will thank you.
- Allow processed jars to cool undisturbed for 12–24 hours before checking seals.
- Label jars with their contents and preserving date.
And remember, while properly processed preserves may remain safe beyond 12 months if their seals remain intact and they’re stored correctly, quality is generally best within the first year. Always refrigerate after opening.
What About Reusing Jars and Lids?
I’m a big fan of reusing preserving jars. In fact, I’ve amassed quite a collection of Agee jars over the years! Good-quality preserving jars can be reused many times, provided they’re free from chips, cracks and other damage and are suitable for the preserving method.
Lids are another matter. Standard two-piece preserving lids have reusable screw bands, but the flat sealing discs are designed for single-use when heat processing. Some specialist preserving systems have reusable lids or seals, so always follow their specific instructions.
Ordinary twist-off lids from commercially purchased food jars shouldn’t automatically be considered suitable for repeated home canning.
Once your processed jars have cooled, check that they’ve sealed correctly. With standard metal vacuum lids, the centre should be slightly concave and shouldn’t flex up and down when pressed.
And there’s something rather satisfying about that familiar ‘pop’ when you eventually open a jar of homemade goodness!
The Bottom Line
Our grandmothers may have sterilised everything in sight, but modern preserving science has made life a little easier.
Clean jars, appropriate lids, tested recipes and correct processing methods are what matter most.
For pressure canning, the processing itself takes care of sterilisation. For water bath preserving, processing for 10 minutes or longer means pre-sterilising jars isn’t necessary either.
It’s one less job to worry about when you’re up to your elbows in tomatoes, beans or whatever else the garden has decided to produce in ridiculous quantities!
And that, in my book, is a win.
For further guidance, refer to the USDA Complete Guide to Home Canning and the National Center for Home Food Preservation. Both provide tested recommendations for jar preparation, processing times and safe home preserving.
Happy preserving!


August 14, 2026
AAAAARGH.
I was all set to nod to myself and say “yes, she’s got the idea about sterilising” when you suddenly added in the old chestnut about using a dishwasher. NO!!! A dishwasher does NOT sterilise. Cleans, yes, very good idea to run jars through BEFORE STERILISING IN AN OVEN OR BOILING WATER.
Do you really believe your dishwasher goes bubble bubble boil boil? ‘Cos if it doesn’t, IT IS NOT STERILISING!!
Rant over.
Wonderful recipe!
August 15, 2026
Thanks Deborah for raising that! Agreed. Updated. Rants are welcome around here (well, lovely rants like yours anyway!). >>Julie