When I first bought my pressure canner, I was a little terrified of the thought of blowing something up! Would it be a jar? The canner? My kitchen?
I’m delighted to report that my first, slightly wobbly concerns weren’t required! To share my comfort in knowing that the process works, I’m sharing my time pressure canning carrots… although this is less about the carrots and more about the pressure canning process itself.
Preparing the Carrots
There are two methods for pressure canning plain vegetables: raw pack and hot pack.
- Raw pack: Raw vegetables are packed into jars and covered with boiling water.
- Hot pack: Vegetables are briefly cooked before being packed into hot jars and covered with their hot cooking liquid.
I’m using the raw-pack method, which is wonderfully straightforward. I’ve washed, peeled and chopped my carrots, packed them into clean, hot quart jars (approximately 950 ml), and covered them with boiling water, leaving 1 inch (2.5 cm) of headspace.
You can add salt if you wish, but here’s something worth knowing: salt isn’t necessary for safely pressure canning plain carrots. It’s simply there for flavour. The pressure canning process does the preserving, not the salt. If adding salt, use plain, non-iodised salt.
With the rims wiped clean and the lids fitted according to the manufacturer’s instructions, we’re ready to go.
Preparing the Pressure Canner
First things first, read your pressure canner’s instruction manual. Different makes and models have slightly different requirements, and it’s important to become familiar with yours.
My pressure canner requires 3 US quarts of water, which is approximately 2.8 litres, in the bottom of the canner. Unlike water bath preserving, where jars are completely submerged, pressure canning uses a relatively small amount of water to create pressurised steam. It’s this steam, under pressure, that allows the temperature inside the canner to rise above the normal boiling point of water.
I also add 2 tablespoons of white vinegar to the canner water. This isn’t for preserving the carrots, but rather to help prevent mineral deposits and water marks forming on the outside of the jars.
Make sure the canning rack is in place so the jars aren’t sitting directly on the bottom of the pot.
In go the filled jars, upright and evenly spaced.
Lid On, Weight Off!
Check that the vent pipe is clear and that the sealing ring and safety mechanisms are in good condition. With the jars safely inside, it’s time to secure the canner lid. At this stage, leave the pressure regulator weight OFF.
Turn on the heat and wait for steam to begin escaping steadily from the vent pipe. You may initially see a little bubbling, spluttering or intermittent steam. What we’re looking for is a strong, continuous flow of steam.
Once that happens, start your timer. Allow the canner to vent for a full 10 minutes. This is an important step because it forces air out of the canner. Trapped air can interfere with the temperature achieved during processing, even when the pressure gauge appears to be reading correctly. Don’t be tempted to shorten this step. Ten minutes means ten minutes!
Adding the Weight and Building Pressure
Once the 10-minute venting period is complete, it’s time to fit the pressure regulator weight, following your canner’s instructions.
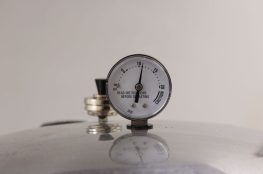
And now, hands off! There’s no need to fiddle with it, lift it or remove it while the canner is pressurised. As pressure builds, the little pressure lock will rise, indicating that the canner is becoming pressurised. If you have a dial-gauge canner like mine, you’ll also notice the needle slowly moving upwards.
For my batch of carrots, I’m using quart jars, and my tested recipe requires 30 minutes at 11 pounds per square inch (psi), using a dial-gauge pressure canner at my altitude.
A couple of important points here:
- Processing pressure depends on your altitude and the type of pressure canner you’re using.
- Dial-gauge and weighted-gauge canners have different pressure requirements.
- Processing time and pressure must come from a tested recipe, not guesswork.
And here’s something else: the processing timer doesn’t start when you put the weight on. It starts only once the correct pressure has been reached.
Maintaining Pressure – The Balancing Act!
Now comes the interesting bit. I have an old-fashioned electric stovetop with manual controls. It’s a bit like turning a ship. You make an adjustment and then wait for something to happen!
As the pressure gauge approaches 11 psi, I start reducing the heat slightly, anticipating that the element will take a little time to respond.
It’s a balancing act. Too much heat and the pressure keeps climbing. Too little and it starts dropping. The goal is to maintain the required pressure, or slightly above it, for the entire processing time.
If the pressure drops below the required level, you must bring it back up and restart the full processing time from the beginning. If it climbs a little above the required pressure, that’s not necessarily a problem, provided it remains within your canner’s safe operating limits. Gradually adjust the heat rather than making sudden changes.
And whatever you do, don’t wander off to do the gardening! Pressure canning isn’t something to leave unattended. Keep an eye on that gauge and make small adjustments as necessary. Once you’ve found the sweet spot on your stovetop, things become much easier.
For my carrots, it’s 30 minutes at the required pressure. Job done! Well, almost.
Turning Off the Heat – And Walking Away
Once the processing time is complete, turn off the heat. And then? Do absolutely nothing! Well, not quite nothing. You can make a cuppa, tidy the kitchen or contemplate what you’ll be pressure canning next. But don’t touch the pressure regulator, don’t open the lid, and don’t try to speed up the cooling process. No cold water, no lifting the weight, no moving the canner about.
Allow the pressure to drop naturally.
This is important because sudden pressure changes can cause liquid to escape from the jars, a process called siphoning. It can also interfere with the proper sealing of the jars.
Be patient. The canner will depressurise in its own good time.
Opening the Pressure Canner Safely
Once the dial gauge has returned to zero, check that the pressure lock has dropped completely. But don’t rush to open the lid just yet.
Follow your manufacturer’s instructions for depressurising. For a typical dial-gauge canner, once fully depressurised, remove the regulator weight and wait a further 10 minutes before opening the lid.
Only remove the weight once you’re certain there’s no pressure remaining. Then carefully unlock the lid, tilting it away from you as you lift it. There may still be plenty of hot steam inside, and you certainly don’t want a faceful of that!
And there they are. Beautiful jars of carrots, still bubbling away. It’s quite a satisfying sight.
Removing the Jars
Using a proper jar lifter, carefully remove the jars one at a time, keeping them upright.
Place them on a dry tea towel laid over a board or another heat-resistant surface, away from cold draughts. Don’t tilt them to remove water from the lids, don’t tighten the bands, and don’t poke or prod anything. Just leave them alone.
The jars need to cool undisturbed for 12–24 hours.
During this time, the contents cool and a vacuum forms beneath each lid, creating the seal that helps keep the food protected during storage. You might hear the occasional ping as the lids seal. Music to a preserver’s ears!
Checking the Seals
The following morning, it’s time for the moment of truth. Once the jars have cooled for 12–24 hours, remove the screw bands and check the seals.
For two-piece metal lids, the centre should be slightly concave and shouldn’t flex up and down when gently pressed. You can also gently try lifting the lid with your fingertips. A properly sealed lid should remain firmly attached without the screw band holding it in place.
I like to tap the lid with a spoon and listen for a high-pitched ringing sound. While that can be a useful indication, it isn’t a reliable test on its own. A vacuum seal is important, but it doesn’t prove that the contents were processed safely. That’s why following a tested recipe, with the correct pressure and processing time, matters so much.
If a jar hasn’t sealed, refrigerate it and use the contents within a few days, freeze them in a suitable container, or reprocess within 24 hours following tested instructions.
Where Has All the Water Gone?
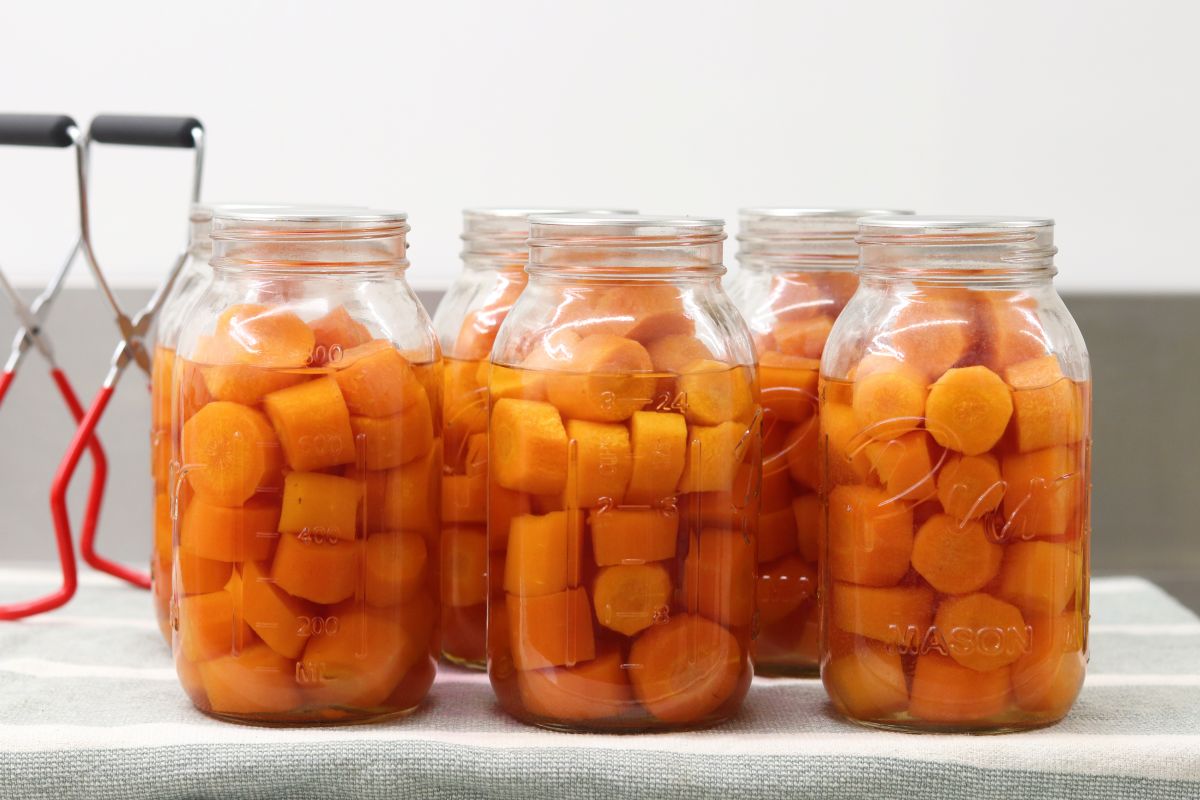
When I packed my raw carrots, I filled each jar with boiling water, leaving 1 inch of headspace. But after processing, some of that water had disappeared! Had I done something wrong? Not necessarily.
This is called siphoning, and it’s relatively common during pressure canning. Liquid can escape from the jars as pressure changes during processing and cooling. It may happen because of fluctuating pressure, rapid depressurisation, trapped air or jars being packed too tightly.
A small amount of liquid loss isn’t generally a safety concern, provided the jars were correctly processed and have sealed properly.
If approximately half or more of the original liquid has been lost, however, the jar should be refrigerated and used promptly rather than stored on the pantry shelf.
Don’t open a sealed jar to top up the liquid. That would break the seal and defeat the purpose of all your hard work!
In my case, I’d lost a little water from the tops of the jars, but the carrots were still largely submerged. Nothing too dramatic.
Bands Off, Date On, Into the Pantry
Once the jars have passed their seal checks, give them a gentle wash to remove any residue (if rerquired), dry them thoroughly and date them.
Write the date on the metal lids in permanent marker (or on a label, whatever works for you). Remember that while the screw bands are reusable for another batch (if in good condition) the lids are ‘one time use only’ when it comes to pressure canning.
I store mine without the screw bands, which makes it easier to notice if a seal subsequently fails. Keep the jars somewhere cool, dark and dry, and check the seals again before opening them for use. And there you have it. Home-preserved carrots, ready and waiting for another day.